Wednesday, July 28, 2010

peanut butter sandwich cookies


The cookie jar is full again and I kinda feel bad.  Bad because I filled it with peanut butter cookies which are my favorite and I know will tempt me until they are gone.  I feel even worse that Campbell who has now had sugar and who has been instructed by her doctor to eat fattening foods to get some meat on those bones can't have these.  No peanut butter ... no peanut butter for awhile.  I can't imagine a world with no peanut butter.  Poor girl!  These cookies are similar in concept to the girl scout peanut butter sandwich cookie.  Unlike the girl scout cookie these cookies are moist with just the right amount of crispness to hold in the very creamy delicious filling.  The filling is almost too creamy for these cookies.  I have another peanut butter filling which I think I will sub in next time for comparison.  These are easy, you can have dough on hand in freezer and I think they could really be dressed up if you dipped half in chocolate.  I followed the instructions and made them rectangular but, I think next time I will try round.
peanut butter sandwich cookies
Source: Everyday Food
  • 1/2 teaspoon baking soda
  • 1/4 teaspoon salt
  • 2 cups plus 2 tablespoons all-purpose flour (spooned and leveled)
  • 1/2 cup (1 stick) unsalted butter, room temperature
  • 1 cup packed light-brown sugar
  • 1 1/2 cups smooth peanut butter
  • 1 large egg
  • 1/2 cup whole milk
  • 1/2 cup granulated sugar

Directions

  1. In a bowl, whisk together baking soda, salt, and 2 cups flour; set aside. In a large bowl, using an electric mixer, beat butter, brown sugar, and 1 cup peanut butter until light and fluffy; beat in egg. With mixer on low, gradually add flour mixture, beating just until combined (do not overmix).
  2. Form dough into two 8-inch-long rectangular or circular logs. Wrap each log in waxed or parchment paper; freeze until firm, about 1 hour.
  3. Preheat oven to 350 degrees, with racks in upper and lower thirds. With a sharp knife, slice dough 1/4 inch thick; place on two baking sheets, 1 inch apart. Bake until cookies are puffed, 12 to 15 minutes, rotating sheets halfway through. Transfer to wire racks; let cool.
  4. Make filling: In a saucepan, whisk milk and 2 tablespoons flour over medium until thickened, 2 minutes; let cool. In a bowl, using mixer, beat together 1/2 cup peanut butter and granulated sugar; beat in cooled milk mixture. Spread smooth sides of half the cookies with 1 tablespoon filling; sandwich with remaining cookies. (To store, keep in an airtight container, up to 5 days.)

Tuesday, July 20, 2010

aunt louise's red velvet (cup)cake


Campbell turned one!  I was 8 days late with Campbell.  July 15, 2009 was a warm summer day.  Carter and I were doing a few errands when out of the corner of my eye I spotted Suzi Cakes.  I love cake and I thought well why not.  I don't feel like cooking so, lets buy a big slice of cake for dinner.  We got our cake and I am going to say Brad, Carter and I started in on this jumbo slice of cake following a healthy well rounded meal but, I doubt it.  I was so over being pregnant.  As we devoured the most delicious, enormous slice of decadent red velvet cake I started to feel some twinges.  I did not want to be an alarmist so, I suggested we go in the jacuzzi.  When we were in the jacuzzi things were getting a bit more intense so, I mentioned to Brad that I thought I was possibly going into labor.  He said lets start timing so, we started and things were 7 minutes apart.  I said if the next one is 7 minutes apart I will get in the shower.  Sure enough I had to jump in the shower and by the time I got out they were 5 minutes apart.  Determined not to neglect my first born I got him in his Pj's and in bed.  I called Brad's parents to tell them I thought it was time and called the doctor to say we were on our way.  I read Carter a book and kissed him goodbye.  By the time we got to the hospital I was well dilated and got a harsh word about waiting it out so long at home.  We were checked in and settled by about 10:30 and on July 16th at 1:34AM little Miss Campbell made her way into the world.  I will never forget when Brad announced to the room "it's a girl" or that slice of red velvet cake.  It was our last time and meal as a family of 3.   She came into this world as sweet as can be and this year has been beyond blessed.  Happy Birthday Cookie!  We love our family of 4.


I have made a lot of red velvet cakes.  I need to do a side by side comparison but, I think this is my favorite one thus far.  The chocolate flavor is slight but, detectable and it does not over power the tang you would expect from a red velvet cake.  The cake is moist and the frosting ... well it was soft but, delicious!

aunt louise's red velvet cake
source: bon appetit y'all

2½ cups all-purpose flour
2 teaspoons cocoa powder
1 teaspoon fine sea salt
1 teaspoon baking soda
1 cup buttermilk
1 teaspoon white vinegar
2 cups vegetable oil
1½ cups sugar
2 large eggs
1 ounce red food coloring

8 ounces cream cheese, room temperature
1/4 cup (1/2 stick) unsalted butter, room temperature
1 pound confectioners’ sugar, sifted
1 teaspoon pure vanilla extract

Preheat oven to 350 degrees. Butter and flour three 9-inch cake pans.

Sift together the flour, cocoa, salt and baking soda. set aside. In a liquid measuring cup, combine the buttermilk, vanilla and vinegar. Set aside.

In the bowl of an electric mixer fitted with the paddle attachment combine the oil and sugar on medium speed. Add the eggs one at a time. Mix well after each addition.  With the mixer on low add the food coloring. Add the dry ingredients, alternating with the buttermilk, starting and ending with flour.  Mix just until combined.

Divide the batter between the prepared pans and transfer to the heated oven. Bake 25-30 minutes (18-22 for cupcakes) or until a toothpick inserted into the cake comes out clean.  Let cakes cool in pans for 5 minutes and invert onto racks.

Meanwhile, in a bowl of an electric mixer fitted with a paddle attachment, beat the cream cheese and butter until smooth. Add confectioners' sugar and beat until light and fluffy.  Beat in vanilla. 

To assemble, place one cake layer on a cake plate. Spread with frosting. Repeat with remaining layers, placing the final layer bottom side up. Lightly coat the assembled cake with a thin layer of frosting to protect against crumbs in the frosting. Finish with remaining frosting.

Cake can be stored up to 5 days in an air-tight container in the refrigerator.

Thursday, July 15, 2010

salted chocolate ganache cake


Sweet and salty is a new flavor combination to me.  Well not new I do love payday bars and chocolate covered pretzels.  New in terms of baking in my kitchen.  I have had this recipe for awhile and have hesitated to make it because I knew the sweet salty combination would not be well received by the boys in the house.  The bean initially thought the "white stuff" was sprinkles.  His little face scrunched up in disgust as he picked off a flake and popped it in his mouth.  He had no issues eating the cake part but, for the first time I saw the frosting left behind.  The cake is light, moist and not overly sweet.  The chocolate ganache is rich and the sea salt is very present.  Be very careful with the salt because it could quickly over power the cake.  This cake is good but, the flavors are more on the adult side so, don't try to sneak a piece to your 3 year old or you may get the "white stuff" questioned.

salted chocolate ganache cake
source: cooking light


cooking spray
2 teaspoons cake flour
5.3 ounces sifted cake flour (about 1 1/4 cups)
1 1/2 teaspoons baking powder
1/2 cup packed dark brown sugar
1/4 cup butter, softened
1 large egg
3/4 cup evaporated fat-free milk
1 teaspoon vanilla extract
2 large egg whites
3 tablespoons dark brown sugar
2 1/2 ounces dark chocolate, divided
1 tablespoon butter
1/4 teaspoon sea salt


1. Preheat oven to 350°.
2. Coat 1 (9-inch) round cake pan with cooking spray; dust with 2 teaspoons flour.
3. Weigh or lightly spoon 5.3 ounces flour into dry measuring cups; level with a knife. Combine flour and baking powder in a bowl; stir with a whisk. Place 1/2 cup sugar and 1/4 cup butter in a large bowl; beat with a mixer at medium speed until well blended (about 5 minutes). Add egg; mix well. Add flour mixture to sugar mixture alternately with milk, beginning and ending with flour mixture. Stir in vanilla.
4. Beat egg whites with a mixer at high speed until foamy using clean, dry beaters. Gradually add 3 tablespoons sugar, beating until stiff peaks form. Gently fold half of egg white mixture into flour mixture; fold in remaining egg white mixture. Grate 1/2 ounce chocolate; fold grated chocolate into batter. Pour batter into prepared pan. Bake at 350° for 23 minutes or until a wooden pick inserted near center comes out clean. Cool in pan 10 minutes. Remove from pan; cool completely on a wire rack.
5. Chop the remaining 2 ounces chocolate. Combine chopped chocolate and 1 tablespoon butter in a microwave-safe bowl. Microwave at MEDIUM 1 minute or until chocolate melts, stirring every 15 seconds. Spread chocolate mixture over top of cake; sprinkle evenly with sea salt. Cut into 8 wedges.

Tuesday, July 13, 2010

red chicken curry


Almost 10 years ago if you asked me to go grab some curry I would have refused.  I don't know why I thought I didn't like curry.  I just had it in my mind that I didn't like curry.  My husband took me out for curry when we started dating.  We were at that point where I could say I hate curry.  Well I am glad that we were in that awkward stage because I realized that evening that I loved curry.  I liked the hot spicy mix of this new flavor combination I had never tasted before.  I was getting chiles, lemongrass, corriander... and I was hooked. I have not been very successful making curry at home.  This recipe is very simple and has a good balance between sweet and spicy.  Hoping that this is just the first step into the world of Thai cooking. 

red chicken curry
source: Cooking Light
1 tablespoon canola oil
3 (6-ounce) skinless, boneless chicken breast halves, cut into 1-inch pieces
1/2 teaspoon salt
2 cups green bell pepper strips (about 1 large)
2 tablespoons fresh lime juice
2 tablespoons less-sodium soy sauce
2 tablespoons red curry paste
1 teaspoon sugar
1 (14-ounce) can light coconut milk
3 cups hot cooked long-grain rice
1. Heat a large nonstick skillet over medium-high heat. Add oil to pan; swirl to coat. Sprinkle chicken evenly with salt. Add chicken to pan; cook 6 minutes or until browned, turning once. Add bell pepper to pan; sauté 4 minutes, stirring occasionally. Remove chicken mixture from pan. Combine juice, soy sauce, curry paste, and sugar in a small bowl, stirring with a whisk. Add juice mixture and coconut milk to pan; bring to a boil. Cook 12 minutes or until slightly thick. Return chicken mixture to pan; cook 2 minutes or until thoroughly heated. Serve over rice.

Wednesday, July 7, 2010

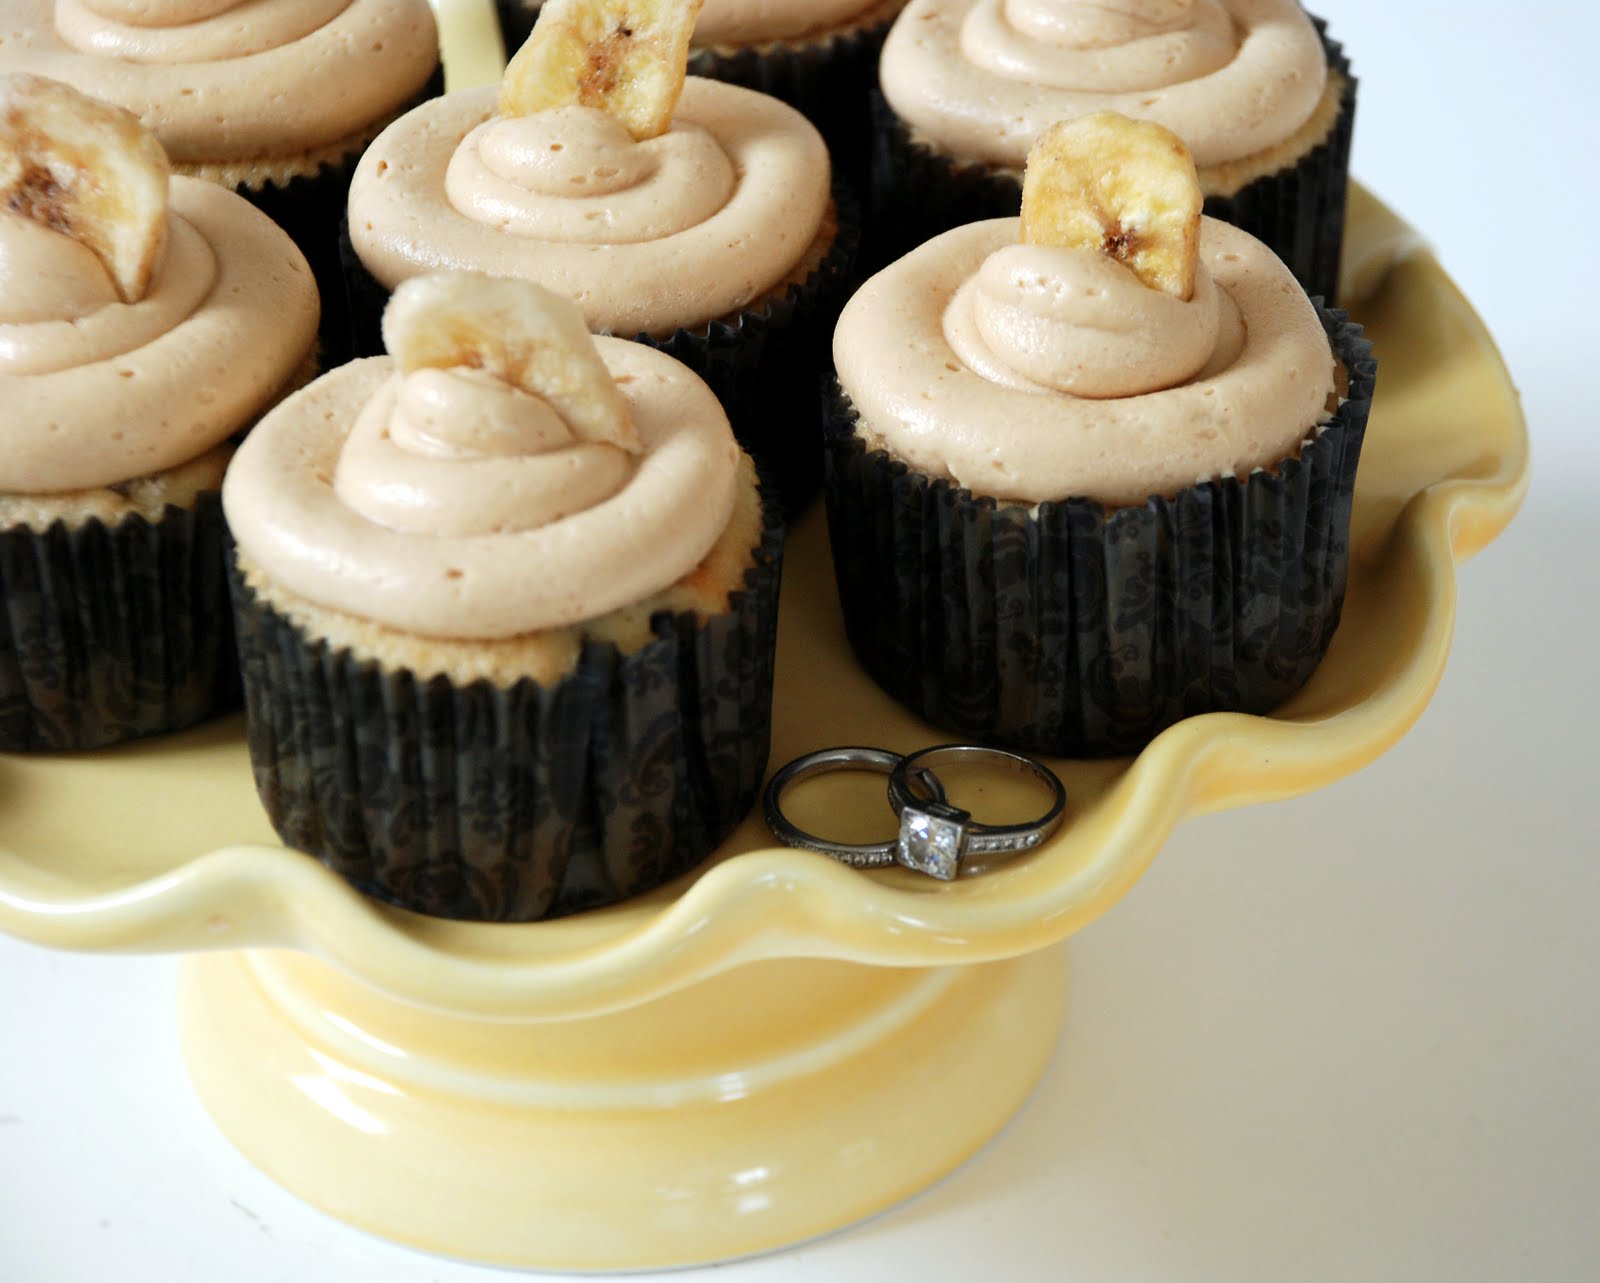
banana cupcakes with peanut butter frosting


Proposal has been on my mind quite a bit the past few days after Edward popped the question to Bella and she accepted only to have the screen go dark when they determined they had to tell Charlie.  Pathetic I know but, who doesn't have a guilty pleasure?  Eclipse was my favorite of the four books so, I was so excited to be able to see it with friends this weekend.  Definitely enjoy it and definitely not happy when I figured out I would be 37 when the next movie is released.  One guilty pleasure must follow another so, I indulged in a bit of banana and peanut butter yumminess which is a favorite flavor combination of mine.  These cupcakes are said to make men propose or so, the article claimed.  They are either a dense cupcake or a light muffin whichever way you want to look at it.  The frosting is good with a sweet peanut butter flavor that does not overpower the cupcake.  We all liked them.  Would they make my husband propose?  Doubtful but, he did have two so that is a very good sign. 

"Propose to Him" Banana Cupcakes
Source: Butter Lane Bakery


Cupcakes
1 1/2 cups sugar
1 stick unsalted butter, softened
2 large eggs
1 1/2 tsp. vanilla extract
2 cups all-purpose flour
1/4 tsp. baking powder
1/4 tsp. baking soda
1/4 tsp salt
1 cup buttermilk
1 1/4 cup ripe banana mashed (~2)

Frosting
2 cups powdered sugar
1 stick unsalted butter, softened
1 tsp. vanilla extract
1 cup creamy peanut butter
3 tbsp. milk

Preheat oven to 350 degree.
Cream butter and sugar with a mixer until light and fluffy.
Add eggs and vanilla, and mix until batter is smooth.
Combine all dry ingredients and mix into batter in 3 parts, alternating with buttermilk.  Reduce speed to low and mix for 2 more minutes
Line cupcake pan with wrappers.  Using a spatula, gently fold mashed bananas into batter.  Scoop into cups until 2/3 full.
Bake for 25 minutes and let cool

For Icing
Combine powdered sugar, butter and vanilla.  Mix in peanut butter and milk and blend until spreadable.
Pipe onto cooled cupcakes.

Thursday, July 1, 2010

summer vegetable succotash with basil


My supperdish my succotash wish ... I never really knew what succotash was but, I sure LOVED that song.  I just learned that succotash is a dish that is primarily made from corn and shelled beans.  The dish can be adapted easily and made with seasonal vegetables.  I have played around adding different veggies such as baby Yukon gold potatoes, red bell pepper and okra. They were all good but, the combination below is my favorite.   Black-eyed peas, edamame, or lima beans can be substituted or added.  I love the lightness of this side and the use of so many fresh summer vegetables.  This is so easy to make, pairs well with many summer meals, and the left overs taste great.

summer vegetable succotash with basil
Adapted from Bon Appetit Y'all

2 cups butter beans (1.5lbs shelled)
1/2 tsp kosher salt
1/4 tsp fresh ground pepper
1 tbsp olive oil
1 tbsp unsalted butter
1 vidalia onion, chopped
4 ears sweets corn (cut kernels off cob)
1 yellow summer squash, chopped
1 zucchini, chopped
1 cup grape tomatoes, halved
1/4 cup chopped basil

In a large skillet heat the oil and butter over medium high heat until the foam subsides.  Add the onion, corn, squash, and zucchini.  Season with the salt and pepper.  Cook until crisp tender about 5-8 minutes.  Stir in the butter beans and cook until heated through.  Take off the heat and add the tomatoes and basil.  Taste and adjust for seasoning.  Serve hot, warm or cold.

Wednesday, June 30, 2010

deep dark chocolate pudding


Pudding ... I have a lot to say about pudding.  Who knew?  I never felt excited about making homemade pudding.  I always breezed past the page. I had the mason jars washed and on the counter and the Bean's love of pudding cups after lunch made me take the dive.  I am so glad I did.  It is like reliving a childhood memory in a completely decadent way.  This pudding is smooth, thick, creamy and so comforting.  The recipe states 4 servings but, I made 9 individual servings and I can't imagine having a larger portion.  This is such a great summer dessert to have on hand.  The creme fraiche whipped topping is so easy and perfectly balances this rich dessert.  The whipped creme fraiche is slightly sweet with a hint of tart.  As I was making the topping the baby was peering up at me.  She hardly ate anything for dinner which was odd. I have been holding to my no sweets until the first birthday but, her little face and big eyes broke me.  I told the hubby to give her a taste.  He put is finger in her mouth and I heard two squeals ... Cookie was squealing in delight and my husband was shrieking because he felt two teeth.  Finally teeth and two at the same time.  Both bottom ones are working their way to the surface just days before her first birthday.   Phew ... we were starting to worry we had a baby with no teeth.

deep dark chocolate pudding with whipped creme fraiche
Source: Sticky, Chewy, Messy, Gooey by: Jill O'Connor

Pudding:
6 large egg yolks
2 cups heavy cream
1/4 cup dutch processed cocoa
3/4 cup sugar
3 tbsp cornstarch
1/4 tsp salt
8 ounces semi sweet chocolate finely chopped
1 tsp vanilla extract

Whipped Creme Fraiche
1/2 cup creme fraiche
1 cup heavy cream
1/4 cup confectioners sugar
Related Posts with Thumbnails
 
BLOG DESIGN BY: SHERBET BLOSSOM DESIGNS