Monday, February 27, 2012
mint chocolate chex treats
I am a nut about a lot of random things. In my kitchen I am neurotic about not wasting food and keeping a clean refrigerator and pantry. I do not like half eaten packages of food to sit around and rot. During a bit of spring cleaning in the kitchen I discovered a bunch of partially used holiday baking products. The chocolate mint combination will not translate in the spring so, I threw chocolate chex cereal, chocolate mint marshmallows and mint truffle kisses together. I was really skeptical of the results when I started to melt the mint marshmallows and the mixture had a grey tone. Grey food is really unappetizing. Once the marshmallows were mixed with the cereal and kisses the grey tone was replaced and things were looking up. We were on our way to Mammoth for the week and because I was put off by the grey tone I almost left these treats at home. Bringing them was a smart decision because they were gobbled up by the adults. The kids thought the mint flavor was too prominent. My type A behavior paid off. Tasty, simple no bake treats and a cleaner pantry which is a win all around.
mint chocolate chex treats
source: sweetflours
3 tablespoons unsalted butter
10.5 ounce bag chocolate mint jet puffed marshmallows
4 cups chocolate chex cereal
2 cups cocoa krispies
2 cups mint truffle Hershey kisses; chopped
Melt butter in large saucepan over low heat. Add mint marshmallows and stir until completely melted. Remove from heat.
Add chex cereal. Stir until well coated. Add chopped mint truffle Hershey kisses and stir until pieces are incorporated.
Using a buttered spatula press mixture evenly into 13 x 9 x 2-inch pan coated with cooking spray. Cut into 2-inch squares when cool.
Monday, February 20, 2012
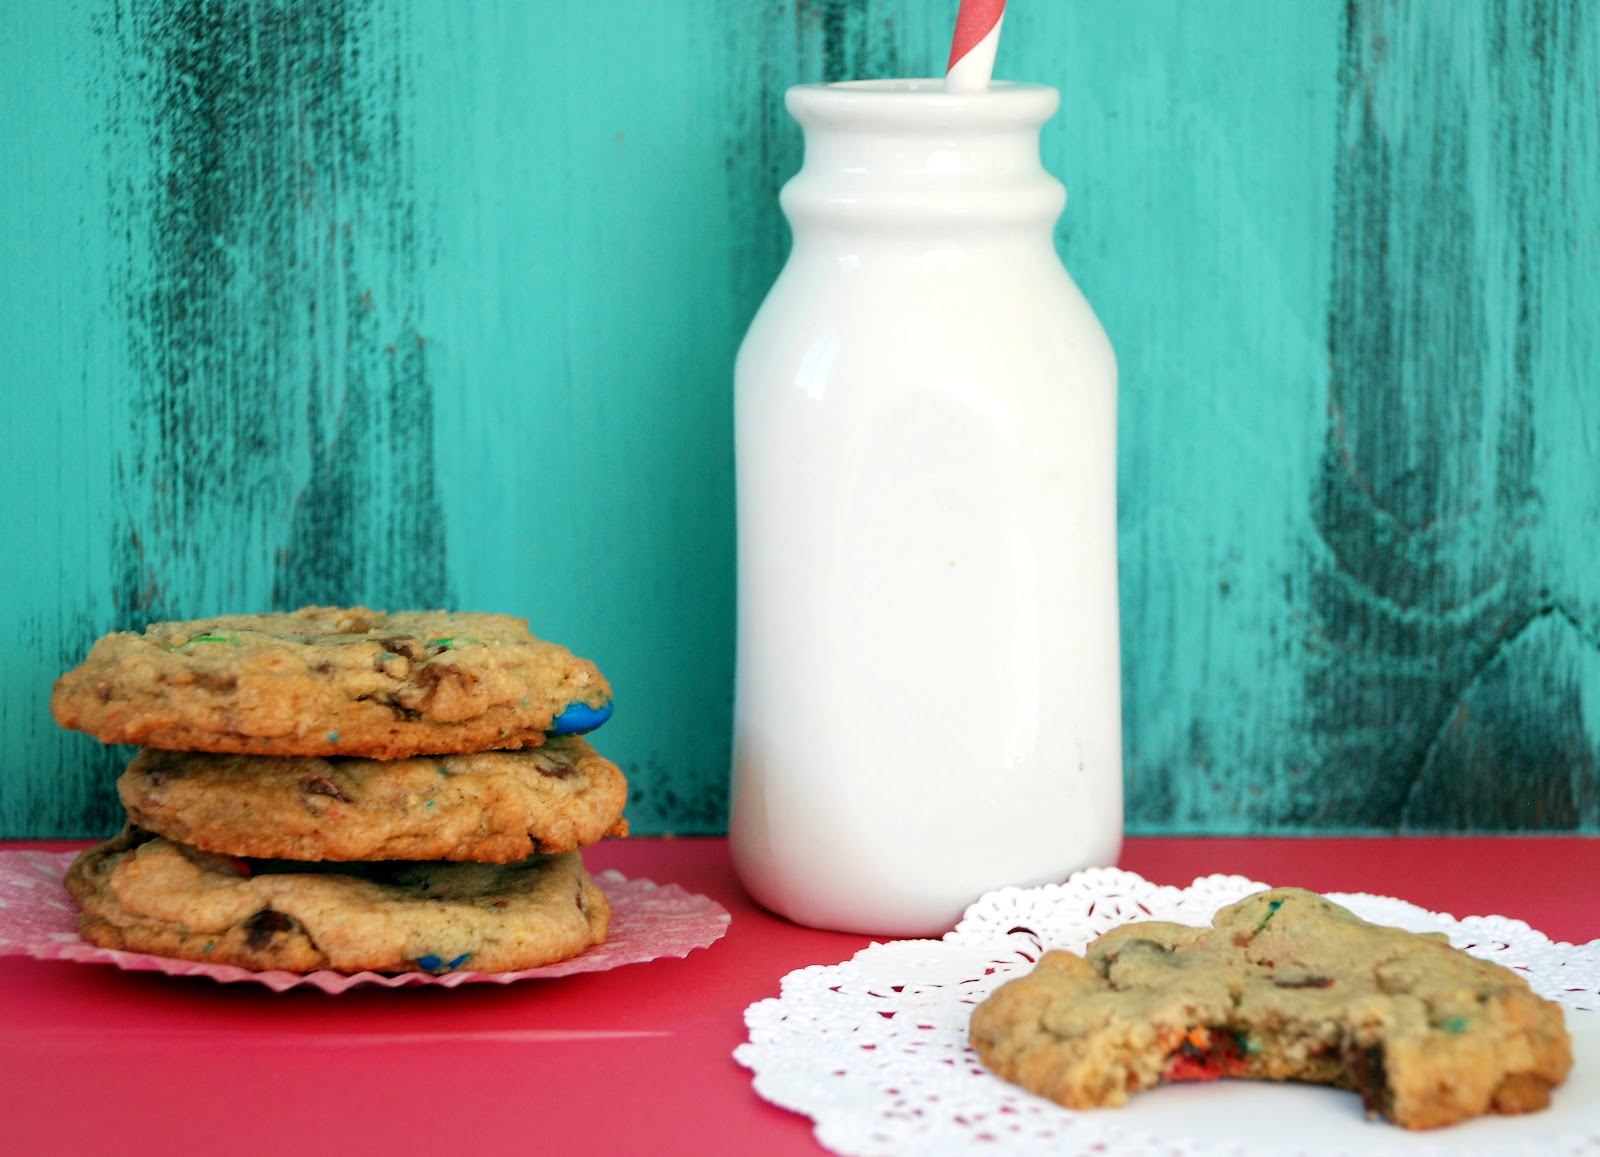
kid's candy cookies
I realized something last week. It kinda broke my heart. I became aware during the lead up to Valentine's Day that some day my sweet boy is not always going to want me as his Valentine. During pick up I noticed that the door was decorated with hearts. Each kid had to explain what love was. Carter nailed it with "love is hugs from my mom". I mean come on he stole my heart. Then I started to glance through the other responses and there it was. A heart with "love is CARTER". A girl with a crush on Carter. what ?!? A very cute, sweet little girl. Of course the minute we got in the car I started in with 20 questions. I got nowhere. He got embarrassed and flustered and just did not want to discuss said crush. My spot in the world felt jeopardized. So I did what any good mom would do and came home and baked up some cookies with all sorts of his favorite candies to solidify my place in his heart for a little longer. We snuggled in our breakfast nook snacking on cookies and milk and the whole world felt right again.
kid's candy cookies
adapted: food network magazine
ingredients
2 1/4 cups all-purpose flour
1 teaspoon baking soda
2 sticks unsalted butter, at room temperature
1 cup packed light brown sugar
1/2 cup granulated sugar
1 teaspoon salt
1 tablespoon vanilla extract
1 large egg plus 1 egg yolk
1 cup pretzel m&m's
1/2 cup semi sweet chocolate chunks or chips ~3 ounces
1/2 cup toffee pieces
3/4 cup peanut butter chips
directions
Preheat the oven to 350 degrees F. Line 2 baking sheets with silpat sheets or parchment. Whisk the flour and baking soda in a bowl.
In a stand mixer fitted with the paddle attachment, cream the butter, brown sugar and granulated sugar on low speed until incorporated, then increase to high speed and beat until light and fluffy.
Add the salt, vanilla, whole egg and egg yolk to the mixer; beat until thoroughly combined. Add the m&m's and beat for a few seconds until slightly crushed. Gradually add the flour mixture, mixing on low speed until just combined. Mix in the chocolate, toffee pieces and peanut butter chips.
Roll heaping tablespoonfuls of dough into balls and place on the prepared baking sheets, about 2 inches apart. Slightly flatten each ball.
Bake the cookies until the edges are golden brown and the centers are no longer wet, 11 to 13 minutes. Cool on the baking sheets for a few minutes, then transfer to a rack to cool completely.
Monday, February 13, 2012
buttermilk pancakes
The Secret Recipe Club is back for the first cycle of 2012. I was assigned the blog eggs milk and honey. The blog is written by Heather an American mother of four living in England. Her blog is filled with delicious family friendly recipes with glimpses of her family life in England. My motivation to replace processed food in our house this year without total household revolt has not dropped. I have successfully tackled and replaced the breakfast bars. When I read through Heathers blog I came across a recipe for buttermilk pancakes. This was a perfect opportunity to give bisquick the boot from my cupboard. I have to be honest I am not a pancake person. I like a bite but, I am much more and eggs and bacon girl. My kids and husband however, request pancakes at least once a week. I pull out the bisquick do a quick mix and pancakes are on the table. There are always a few left so, I freeze them to pop in the toaster later in the week. This Saturday I changed things up with Heather's recipe which is not much harder then bisquick but, tastes so much better then bisquick. They are light and fluffy with the perfect tang from the buttermilk. There was not a single cake left. My daughter even ate the little crunchy pieces that end up on the griddle. I knew this was going to replace my bisquick box once and for all so, I mixed up a few mason jars of the dry ingredients so, I can quickly pull them out and mix up a batch of perfect buttermilk pancakes.
buttermilk pancakes
source: eggs milk and honey
Ingredients
1 cup flour
2 teaspoons sugar
1/2 teaspoon salt
1/2 teaspoon baking powder
1/4 teaspoon baking soda
3/4 cup buttermilk
1/4 cup whole milk
1 large egg, separated
2 tablespoons butter, melted
Whisk together all the dry ingredients in a medium-sized bowl. Combine buttermilk and milk into small bowl. Whisk egg white into mixture. Mix yolk with melted butter in separate bowl. Then stir into milk mixture. Dump wet ingredients into dry ingredients all at once; whisk until just mixed.
Once the griddle or pan is hot enough, pour 1/4 cup of batter onto a lightly oiled or buttered surface. When the pancake surface starts to bubble and the bottom is lightly browned, turn over. It should take a couple of minutes. Cook until remaining side has browned.
Monday, February 6, 2012
banana pudding pops
The kids are still asking for popsicles every day. You may be thinking popsicles in February what is wrong with this girl. The weather here is unseasonably warm this winter. The past two weekends we have spent at the beach. My kids are wearing SPF 50 and I actually have a little sunburn on my back. Crazy but, incredibly amazing. The kids loved the orange pudding pops but, in my effort to reduce the processed food I looked for another way to achieve a pudding pop with out pudding mix and cool whip. They may have actually liked these even more which is a win for all of us. Perfect southern California winter treat for an afternoon snack or dessert.
banana pudding pop
adapted: eating well
ingredients
1/3 cup light brown sugar
2 tablespoons cornstarch
pinch of salt
2 cups milk
2 teaspoons vanilla extract
2 cups diced bananas, (~ 2 large)
6 ounces greek honey yogurt
10 animal cookies or nilla wafers crushed into small pieces
Whisk sugar, cornstarch and salt in a large saucepan. Add milk and whisk until combined. Bring to a boil over medium heat, whisking occasionally. Boil, whisking constantly, for 1 minute. Remove from the heat and stir in vanilla. Allow mixture to cool slightly.
Put about the pudding in a blender and add bananas and yogurt. Process until smooth. Stir the crushed cookies into the pudding mixture. Divide the mixture among freezer-pop molds. Freeze until firm ~6 hours.
Monday, January 30, 2012
yellow butter cake with chocolate frosting
So, you know how I have been talking about reducing the processed food and sugar in my house? Well that new mantra is cool and all except when it comes to birthdays. I am working on introducing new healthy replacements for many of our sugary snacks and treats but, even I am not at a place where I want to enjoy an agave sweetened gluten free oat cake on my birthday. Maybe in 2013 but, for now we will just celebrate old school with a yellow butter cake and chocolate frosting. This cake is a classic that I am not prepared to screw with at this point. I am not going to lie I have a better yellow cake recipe but, it is super involved and this recipe is simple straight forward and most likely have all the ingredients already in your kitchen. The frosting is down right delicious and so, easy. This is my go to chocolate fudge frosting. Did you know you can make super good frosting in the food processor? Well you can and you don't even have to sift. So if you are looking for a simple yet, delicious and decadent cake for your next gathering this classic may be the way to go.
yellow butter cake with chocolate frosting
cake adapted: martha stewart
frosting source: sky high cakes
Cake:
2 sticks (1 cup) unsalted butter, at room temperature
1½ cups all-purpose flour
1½ cups cake flour
1 tablespoon baking powder
½ teaspoon salt
1¾ cups sugar
4 large eggs
2 teaspoon vanilla extract
1¼ cups milk
Frosting:
6 ounces unsweetened chocolate, melted and cooled
4 1/2 cups confectioners’ sugar (no need to sift)
3 sticks (12 ounces) unsalted butter, at room temperature
6 tablespoons whole milk
1 tablespoon vanilla extract
Directions: To make the cakes, preheat the oven to 350˚ F. Prepare two 9-inch round cake pans with bakers joy. In a medium bowl, sift the all-purpose flour, cake flour, baking powder, and salt; whisk together to blend well and set aside.
In the bowl of an electric mixer, combine the butter and sugar. Beat on medium-high speed until light and fluffy, about 4 minutes, scraping down the bowl as needed. Mix in the eggs one at a time, beating well after each addition. Blend in the vanilla. With the mixer on low speed, add in the dry ingredients in three additions, alternating with the milk. Beat each addition just until incorporated.
Divide the batter between the prepared baking pans. Bake, rotating the pans halfway through baking, until the cakes are golden and a toothpick inserted in the center comes out clean, 30-35 minutes. Transfer the pans to a wire rack and let cool 20 minutes. Run a knife around the edge of the pans to help remove the cakes. Invert the cakes onto the rack. Let the cakes cool completely before frosting. Level the cakes if necessary.
To make the frosting, place all of the ingredients in a food processor and pulse to incorporate, then process until the frosting is smooth.
To assemble the cake, place one of the cake layers on a serving platter. Top with 1 cup of the chocolate frosting and smooth over the top of the cake. Top with the remaining cake layer. Frost the top and sides of the cake with the remaining frosting as desired. Refrigerate, covered, for up to 3 days. Let come to room temperature at least 30 minutes before serving.
Thursday, January 26, 2012
slow cooker basic marinara sauce
Now that I am a stay at home mom I am trying to find as many short cuts and tricks to still get a home cook meal on the table without having to leave the park early and spend hours in the kitchen. Learning to master my slow cooker is my personal challenge for 2012. This recipe makes a ton of marinara sauce. I portioned it out and froze it for future meals which helps a ton when you are trying to throw together a quick home cooked meal. Not only is this marinara sauce easy and tasty but, it is the perfect vehicle to hide some extra veggies in the kids meals. We had it one night as written below. There was no revolt which is always a score when introducing a new recipe to my family. The next night I pureed carrots and zucchini and added them into the sauce while reheating it and no one made a peep. This is a great basic sauce which you can use in a ton of different ways and doctor it up to your families taste. Enjoy!
slow cooker basic marinara sauce
source: slow cooker revolution
2 tablespoons extra virgin olive oil
2 onions, minced
6 garlic cloves, minced
2 tablespoons tomato paste
2 teaspoons dried oregano
2 anchovy fillets, rinsed patted dry and minced
pinch red pepper flakes
1 cup dry red wine
1 28 ounce can crushed tomatoes
1 28 ounce can diced tomatoes, drained
1 28 ounce can tomato sauce
2 tablespoons soy sauce
1/2 cup minced fresh basil
2 teaspoons sugar
salt and pepper
Heat oil in skillet over medium high heat. Add onions through red pepper flakes. Cook until onions are soft and slightly browned, ~8-10 minutes. Stir in wine. Scrap up brown bits and simmer until slightly thickened, ~ 5 minutes. Transfer to slow cooker.
Stir crushed tomatoes through soy sauce into slow cooker. Cover and cook for 9 - 11 hours on low or 5 to 7 hours on high.
Before serving stir in basil and sugar. Add salt and pepper to taste.
Labels:
dressing/sauce,
slow cook,
Slow Cooker Revolution,
tomato
Monday, January 23, 2012
chewy granola bars
I stopped buying processed snacks for my kids about a year ago. I am not a health freak but, I started to see how much processed food they were getting outside the house that I made a decision to reduce the total amount by not having any in our cupboards. My kids adapted really well and know to never ask for those items at the grocery store but, I have become known as the mom in the neighborhood with the lame snacks. Apple slices, pears and string cheese are not bringing the kids in the front door. One thing that I continued to buy last year was cereal bars. My kids ask for one about 3 days a week. One morning I was looking at the box and read that there are over 40 ingredients in them. Many of the ingredients I had no idea what they were. Earlier in the year my nutritionist insisted I cut bars out of my every day menu and have them on hand as an emergency food. Why had this correlation with the kids bars not clicked at that time? At this fully caffeinated moment I realized I could do more then ban goldfish crackers. I made a pact to find better replacements for some of the processed foods that still lingered on my shelves. I am really excited to share these over the next few months. We have had a lot of fun in the kitchen experimenting. The granola bars are a work in progress. I started out with this recipe from King Arthur which is really good but, there are still many ingredients in this recipe I knew I could swap out. I concocted a loose formula which seems to work and is great because you can experiment with all different flavors. I often use up fruit and nuts I bought for a salad or I have the kids get creative with the bin choices at Mother's. Below are a few flavor combinations that have worked for me but, the possibilities are endless.
chewy granola bars
GRAIN (2 1/2 cups)
*suggestions: oats, oat flour, oat bran, wheat germ, quinoa flakes, muesli etc.
NUTS, SEEDS, CRUNCH (1 - 1 1/2 cup)
*suggestions: sliced almonds, peanuts, chia seeds, flax seed, brown rice cereal, pretzels, sunflower seeds, pepitas etc.
SPICES
*suggestions: cinnamon, ginger, salt, pumpkin pie spice, vanilla extract etc.
DRIED FRUIT (1 cup)
*suggestions: cranberries, blueberries, banana chips, dates, pineapple, coconut etc.
FUN (1/4 - 1/2 cup)
*suggestions: carob chips, chocolate covered berries, yogurt chips etc.
STICKY (~3/4 cup)
* I typically mix two stickies. 1/3 - 1/2 cup of one and 1/4 cup of another. See examples below.
*suggestions: honey, brown rice syrup, maple syrup, agave etc.
BINDER (1 cup)
* I make sure there are at least 6 tablespoons of a fat source. That could be nut butter, coconut oil, melted butter etc.
* suggestions: almond butter, peanut butter, pumpkin puree, unsweetened applesauce, greek yogurt, apple butter, banana puree, egg whites, melted butter, coconut oil, neutral oil etc.
Directions:
Preheat oven to 350. Line a 9x9 pan with a parchment sling.
In a large bowl mix together all of your dry ingredients. That includes grains, nuts, seeds, crunch, dry spices, fruit and fun stuff. If you are going to add a bit more stick by way of sugar toss that in here.
In a medium bowl whisk together your sticky sweetener, liquid spices, and binder.
Pour the liquid mixture into your dry mixture and gently fold/mix the two together until all the dry ingredients are coated.
Turn the mixture into the prepared pan. Make sure it is spread evenly and then press and pack the mixture down into the pan.
Bake for ~30 minutes. The top will get a tad brown. Remove from oven and allow bars to cool in pan for 20 minutes. When bars are cool then place the pan in the refrigerator or freezer for approximately 30 minutes. Once bars have set up use the parchment sling to remove bars and slice.
Bars store in an air tight container for a week or in the freezer for 2 months.
Enjoy! Have a delicious and healthy day.
Note:
I store them in the freezer as they do get a bit crumbly. If would want them a bit stickier then toss the oats in a 1/4 cup of sugar (brown, white or turbinado).If you want to boost the protein you could add soy or hemp protein powder.
Banana Honey Carob Granola Bars (The Elvis) - Kids current favorite
1 1/2 cup rolled oats (not instant)
1/2 cup oat bran
1/2 cup wheat germ
1/2 cup brown rice cereal
2 tablespoons chia seeds
1/3 cup unsalted roasted peanuts, crushed
1/3 cup banana chips, crushed
1/3 cup pretzels, crushed
1/4 cup carob chips
1/2 teaspoon salt
1/4 teaspoon cinnamon
1/3 cup honey
1/4 cup brown rice syrup
1/2 cup natural creamy peanut butter
1/2 cup banana puree ~ 2 medium brown bananas
Follow directions above.
Almond Cranberry Dark Chocolate Granola Bars
1 1/2 cup rolled oats (not instant)
1/2 cup oat bran
1/2 cup wheat germ
1/2 cup brown rice cereal
1/2 cup sliced raw almonds
2 tablespoons chia seeds
1 cup dried cranberries
1/2 cup shredded coconut
1/2 cup chocolate covered cranberries
1/2 teaspoon salt
1/4 teaspoon cinnamon
1/3 cup honey
1/4 cup brown rice syrup
1/2 cup almond butter
1/2 cup greek yogurt
Follow directions above.
Subscribe to:
Posts (Atom)