Monday, July 16, 2012

mini magic shell ice cream cones


I have taken a break from blogging to spend the summer with my family.  It has been great enjoying the sun and surf in Newport Beach.  I have still been in the kitchen but, it is nice to cook and bake without the worry of photographing and writing.  I have been pondering if blogging is something I really have the time and desire to continue.  As much as I want to throw in the towel I have used my blog so much this summer looking up past dishes and baked goods.  The reason I started this blog was to capture recipes our family enjoyed and those I wanted to make again. Along the journey I lost myself down some trail of sugar, butter and chocolate.  I stopped making what we loved and started pumping my family with an excessive amount of treats.  I have regained balance and inspiration in the kitchen.  There is no better time then Secret Recipe Club time to dive back in.  This month I was assigned Growing Up Gabel. The author Camille (I love that name!) is a mother extraordinaire.  She manages time to blog, craft, home school, and raise a family.  I had so much fun reading each section of her blog.  This summer I have been focusing on the family so, when I saw Camille's recipe for homemade magic shell I knew this was a kitchen adventure I could include the kids in.  I can not believe how easy and fun this was.  The kids had so much fun dipping, covering the cones in sprinkles and eating them.  Enjoy!


mini magic shell ice cream cones
adapted: growing up gabel

ingredients

1 1/4 cups chocolate chips
1/2 cup coconut oil
1 pint of homemade vanilla ice cream
mini cones

Prepare ice cream.  Fill mini cones to top edge of cone with ice cream.  Pack ice cream in cone and return to freezer for 30 minutes.  Place one scoop of ice cream on top of each cone and return to freezer for 30 minutes. 

While mini cones are getting firm in the freezer prepare the magic shell.
Combine chips and oil in a small pot.  Melt over low heat.  Allow to cool to room temperature before using on ice cream (or it will melt the ice cream).

Remove mini cones from freezer and dip into the magic shell.  Quickly cover in sprinkles and return to the freezer until ready to enjoy cones.

Store leftovers in a jar. You may need to re-heat it if your kitchen is below 76 degrees.


Monday, June 11, 2012

blueberry oat bran mini muffins


It appears that the only thing that motivates me to post these days is the  Secret Recipe Club. It would seem like I don't bake anymore but, if you saw me in person you would know I do.  I can't seem to find the motivation to photograph and write.  This month I was assigned samayalarai-cooking is divine.  The author Jayasree does not have a bio but, from what I can tell she is a mother of three that cooks some seriously delicious looking Indian food.  In addition to Indian food she features many eggless recipes.  I absolutely love Indian food and would have attempted one of the easier dishes but, I did not have access to many of the ingredients.  I opted for her eggless blueberry muffins.  I only modified the recipe where I could not match the ingredients.  Jayasree listed wholemeal flour which when I googled it appears to be the US equivalent of whole wheat flour.  Instead of wheat bran I used oat bran.  I was concerned that these would be dry but, when I tasted the batter I knew I was in for a treat.  The batter was sturdy but,  sweet.  As soon as these came out of the oven my two year old wanted to taste one.  After they cooled she ate 5 mini muffins without batting an eye.  She doesn't even like blueberries.  If that is not an endorsement I don't know what is.  These muffins are not only healthy but, they are extremely tasty.  Enjoy!


blueberry oat bran mini muffins
adapted: samayalarai-cookingisdivine

Ingredients:

1 tablespoon flax meal plus 3 tablespoons water
1 1/4 cup whole wheat pastry flour
1 1/4 cup oat bran

1/2 teaspoon salt
1 1/2 teaspoon baking powder
1 teaspoon baking soda
1 teaspoon cinnamon
1/2 teaspoon nutmeg
1/2 cup brown sugar
2 bananas
1/4 cup honey
1/2 cup milk
4 tablespoons oil
1 teaspoon vanilla extract
1 cup fresh blueberries

Soak flax meal in the 3 tablespoons of very warm water.

Preheat the oven to 350.
Line mini muffin pan with paper liners

Mix the flour, oat bran, baking soda,baking powder, salt, cinnamon, nutmeg and sugar in a large bowl.  Set aside.

In a new bowl mash the bananas with the flax seed powder.   Add the milk, oil and honey. Blend with mixer until well combined.  Add in the vanilla. 

Make a well in the middle on the dry ingredients and pour the wet ingredients into it.   Mix until everything is completely incorporated.  Fold in the blueberries.

Fill your Muffin tins with the batter and bake it for 20 minutes.
Remove from oven and allow to cool on a rack.


Monday, May 14, 2012

chai banana carrot breakfast cookies


It is Secret Recipe Club time again.  This month I was assigned gluten free a-z.  The author Judee is a gluten free, vegetarian who enjoys eating clean and living a healthy lifestyle.  Did someone read my mind?  This is exactly what I need to be eating right now.  I have so many friends and kids of friends who have adapted a gluten free diet.  Those who have adapted to this lifestyle rave about the benefits.  My five year old even comes home from school saying our snack today was gluten free.  The gluten free life style appears to stay.  I love learning and exploring new ways to eat that can result in health benefits.  Breakfast is my favorite meal of the day so, when I saw Judee's recipe for gluten free, vegan breakfast cookies I knew this was what I had to try.  I actually tried to different flavors.  My CSA box arrived with strawberries and carrots so, I mixed up up a strawberry banana version and a chai banana carrot.  The strawberry banana version were sugar free and they are good but, I added some more spice and gluten free yogurt chips to the second batch. The little sweet chips and spice were just perfect for these.  The great thing about Judee's recipe is that it is super adaptable to whatever flavor combination strikes your fancy.  I substituted some quinoa flakes for some of the oats.  I added in chia seeds for crunch.  I think some dried fruit would also be delicious.  Get creative and enjoy!  I love having one with a cup of tea in the afternoon or in the morning with a cup of greek yogurt.  Thanks Judee.  


chai banana carrot breakfast cookies
adapted: gluten free a-z

Servings: 22 * Size: 1 cookie
Calories: 95 (based on chai banana carrot cookie)
* Fat: 5.5 g * Carb: 10.5 g * Fiber: 1.8 g * Protein: 2.1 g * Sugar: 2.6 g * Sodium 86.1 mg

3 bananas; mashed
2 carrots; shredded
1 teaspoon vanilla extract
1/4 cup coconut oil; melted
1 1/2 cup gluten free oats
1/2 cup quinoa flakes
1 tablespoon chia seeds
2/3 cup almond meal
1/3 cup shredded unsweetened coconut flakes
1 teaspoon cardamon
1/2 teaspoon cinnamon
1/2 teaspoon salt
1 teaspoon baking powder
1 1/2 ounces gluten free yogurt chips


Preheat oven to 350.

In a large bowl combine the bananas, carrots, vanilla and coconut oil.  Set aside.  In another bowl whisk together the oats, quinoa flakes, chia seeds, almond meal, shredded coconut, cardamon, cinnamon, salt and baking powder.  Add the dry ingredients to the wet ingredients and stir until combined.  Fold in the yogurt chips.  Let the dough sit in the refrigerator for about 15 minutes.  The dough will firm up and the oats will soften.  Scoop dough onto a baking sheet lined with silpat.  Bake for approximately 12 minutes.

Here is a picture of the yummy strawberry banana version!


Monday, April 30, 2012

quinoa pudding


I am still deep in this funk.  I need a plan.  Plans work for me.  Step one in this plan is to get sleep.  I have determined that I am just not my best self without sleep.  No sleep leads to grumpy mommy and bad food choices.  I spent a few hours in the kitchen today prepping snacks and meals so, I don't have an excuse to make a bad choice if I have a sleepless night.  Hunger pains hit around 3:00 for me.  I am loosely following an exercise and diet plan.  This plan encourages a high protein snack under 200 calories which includes a superfood (quinoa).  I like the tart and tangy combination of the ricotta and the yogurt but, if you like a sweeter base you could add a drizzle of honey or maple syrup.  The quinoa adds a nice crunch and the fresh fruit provides a sweetness to balance the tart and tangy.  Enjoy!


quinoa pudding
adapted: vegetarian times

Servings: 4 * Size: 1 8 ounce mason jar
Calories: 123 (without fruit topping)
* Fat: 2.5 g * Carb: 13.5 g * Fiber: 2 g * Protein: 13 g * Sugar: 6.2 g * Sodium 87.5 mg

1 cup cooked quinoa (1/4 cup red quinoa uncooked)
1 cup low-fat ricotta cheese
1 cup non-fat greek yogurt
1 mango diced

Combine ricotta and greek yogurt.  Whisk to combine.  Fold in cooked quinoa.  Divide pudding between four 8 ounce mason jars.  Top each jar with diced fruit.  Refrigerate.  Enjoy!

Monday, April 16, 2012

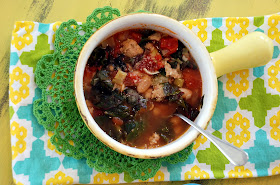
sausage white bean and kale soup


It is Secret Recipe Club time again.  Last month I started my Secret Recipe Club post with this proclamation .... I have been in a health funk lately.   Well it has been a month and my health funk has just snowballed into a general funk.  Funk is not good.  Funk stinks.  Between me being sick, my kids being sick, my husband traveling, minor home remodeling projects I feel overwhelmed, frazzled and funky.  Do you ever look around at school drop off and think how does everyone have it all together?  I know comparing isn't good but, I just want their secret.  How do they do it? 

This month I was assigned la phemme phoodie.  The author is a lawyer by day and a foodie by night.  She has a passion for food but, has some dietary restrictions which has allowed her to experiment with wheat and egg free recipes.  There were several gluten free recipes on her site that I boo marked but, with my perpetual cold and fresh CSA box at my door I opted for her sausage bean and spinach soup.  I had to swap some of the ingredients based on what was in my box but, she suggested many of the swaps in her write up.  This soup is fresh and flavorful yet, extremely comforting with the spicy sausage and creamy beans.  A hot bowl of this on a rainy spring night is just what the doctor ordered.

My palate and mind has been a bit lost on sugar lane lately.  I feel as if I have lost my way.  As tempting and beautiful as all of those sugar masterpieces look I am going to work on refocusing my blog on what I love.  The food I love to eat and the food my body needs.  I need to get out of this funk. 


sausage bean and kale soup
adapted: la phemme phoodie

4 cups chicken broth
2 cups water
1 14.5 oz can italian diced tomatoes
1 lb italian chicken sausages, casings removed
1 leek, chopped
4 cloves garlic, minced
6 ounces fresh kale, rib removes and chopped
2 15 oz can cannellini beans, drained
4 cloves garlic, minced
1 lb italian chicken sausages, casings removed
1 14.5 oz can italian diced tomatoes
salt and pepper
grated parmesan for serving (optional)


Heat the chicken stock, water and diced tomatoes in a dutch oven over medium heat.   In a separate pan cook sausage over medium heat until brown. Remove with a slotted spoon and drain on paper towels. Do not rinse the pan. Reduce heat to low. Add the leek and cook for about 5 minutes. Stir in garlic and cook for another minute. Add the leeks, sausage and beans to dutch oven. Bring the mixture to a boil. Stir in the kale. Reduce heat to low and simmer for 10 minutes. Season with salt and pepper to taste.  Serve hot. Top with grated parmesan.


Sunday, March 25, 2012

honey peanut butter cups


My life these days revolves around my kids meals and the potty.  I am either in the kitchen preparing meals which is typically peanut butter toast for breakfast and a tortilla with peanut butter and honey for lunch.  My kids love peanut butter.  They are my kids after all.  If I am not in the kitchen then I am in the bathroom with my daughter who is potty training.  Don't worry I am a seriously committed hand washer.  After a successful potty trip a prompt request for chocolate follows.  She loves a tiny piece of milk chocolate.  It just made sense to me to combine the kitchen peanut butter and honey with the bathroom chocolate.  When I presented them each with a honey peanut butter cup for dessert I became a super mom.  The husband was also super happy.  He was so happy that I had to hide 12 of them in the freezer.  I had plans for those remaining 12.  Stay tuned.


honey peanut butter cups
adapted: everyday with rachel ray

Ingredients
12 ounces milk chocolate, chopped
4 tablespoons unsalted butter, at room temperature
3/4 cup peanut butter
1/2 cup honey

Fill a mini muffin tin with 24 wrappers. 

In a double boiler, melt the chocolate. Reserve the pot of hot water to keep the chocolate liquid, as necessary.

Place about 1 teaspoons of the melted chocolate in a baking cup, swirling to coat about halfway up the side of the cup. Repeat with the remaining cups. Refrigerate until set.

Using an electric mixer, beat the butter until fluffy, about 2 minutes. Beat in the peanut butter and honey. Transfer the mixture to a resealable plastic bag and snip off one corner.

Fill the chocolate cups about three-quarters full with the peanut butter mixture, smoothing the surface. Refrigerate for 15 minutes.

Top each peanut butter cup with melted chocolate to enclose, smoothing the surface. Refrigerate until hardened.

Monday, March 12, 2012

breakfast quinoa with a caramelized banana and carrot topping


It is Secret Recipe Club time again.  I have been in a health funk lately.  When I was assigned the blog get healthy with Heather it was the perfect kick I needed to get my mind reset on the concept that health is a lifestyle.  I am fairly committed to a healthy lifestyle but, it is always inspiring for me to read exercise tips and recipes from another health conscience individual.  Heather's blog is filled with recipes, fitness and pregnancy information.  Reading her blog made me feel as if I met my perfect breakfast companion.  I think Heather enjoys oatmeal as much as I do.  We both have oatmeal recipes that include ingredients such as carrots, zucchini, bananas, eggs and chia seeds.  I eat overnight oats almost every morning.  I never get sick of oatmeal.  Breakfast quinoa has been on my radar for awhile but, I never wanted to make it because that would mean no morning oatmeal.  Heather's recipe gave me the perfect opportunity to put the oats on the back burner and give quinoa in the morning a try.  One word ... bananas!  I loved  it.  I have had it both hot and cold. I have had it several days in a row. The slight crunch is a nice change from the soft oats.  It is so easy to prep and it is packed with protein.  Take Heather's advice and start your morning off with this nutritious and delicious bowl of quinoa with endless possibilities of variations.  My favorite bowl was topped with caramelized bananas, carrots and walnuts.  Just bananas!

breakfast quinoa with caramelized bananas and carrots
source: get healthy with Heather

Ingredients

1 cup quinoa, rinsed
2 cups water
1 cinnamon stick, broken in half
2 cups unsweetened almond milk
2 tablespoons chia seeds.
1 tablespoon of butter
1 banana, sliced
1 carrot, julienned
1 tablespoon walnuts, chopped
1 tablespoon agave
1 teaspoon cinnamon


The night before bring the quinoa, water and cinnamon stick to a boil in a small pot on the stove top.  Cover and simmer for 15 minutes, or until the liquid is absorbed.  Remove the cinnamon stick.

Separate into 4 bowl, cool to room temperature, cover and place in the fridge for the night.

Remove a bowl from the refrigerator and add a 1/2 cup if almond milk and 1/2 a tablespoon of chia seeds per bowl.  Give a good stir and let for 5-10 minutes. 

While quinoa is sitting. Warm up a small skillet over medium heat.  Melt butter.  Toss the banana, carrot, walnuts with agave and cinnamon in a small bowl.  Add the mixture to the skillet with the melted butter.  Allow the mixture to caramelize by cooking for approximately 5 minutes stirring frequently. 

Warm bowl of quinoa in the microwave for 60-90 seconds.

Top with a quarter of the caramelized topping. 

*The quinoa is also great served cold with fresh berries.

Thursday, March 8, 2012

slow cooker easy pesto meatballs


Something strange happened tonight.  The family sat down at the dinner table together and we all ate the same meal.  This was a dream come true moment for me.  There were no substitutes, no modifications, and no deconstructed versions. Best of all no gripes, complaints or food struggles.  Meatballs are a new food for my kids.  Meatballs in my mind are a gateway food.  Once we tackle meatballs the door to meatloaf and hamburgers open up.  We need to continue to love the meatball.  These meatballs are super simple and even though pesto is in the name of the recipe the pesto flavor is very mild.  The pesto adds nice flavor and a softness to the texture of the meatball.  The first night we had the meatballs over pasta and the second night we made meatball slides.  A simple healthy meal made in the slow cooker that the whole family will eat is a definite repeater.

slow cooker easy pesto meatballs
source: slow cooker revolution

1 pound ground turkey
2/3 cup plain bread crumbs
2/3 cup fresh pesto
1/4 cup grated Parmesan
1 egg yolk
2 (24oz) tomato sauce (Bertolli tomato and basil)
1/2 cup water
salt and pepper

Mix turkey through egg yolk in a large bowl using your hands.  Using a cookie scoop pinch off and roll mixture into 1 1/2 inch balls.  Microwave meatballs on a large plate for 5 minutes until firm and fat is rendered.

Add tomato sauce and water into slow cooker and mix.  Drain the rendered fat and nestle the meatballs into the sauce in the slow cooker.  Cover and cook on low for 4 to 6 hours.  Season with salt and pepper and serve.

Monday, March 5, 2012

chocolate chip coffee muffins


Am I the only person that goes to bed thinking about coffee?  I absolutely love my morning cup of coffee.  I know I like the caffeine but, I think I just love the morning ritual.  Enjoying my steaming cup of coffee on the couch in the morning waiting for my sleepy eyed kids to roll out of their rooms.  A snuggle with their warm little bodies and a glimpse of their crazy bedhead gets my morning started.  After the kids wiggle free from my arms they always exclaim "mommy's coffee is yucky!"  I totally disagree with this statement.  I remember thinking coffee was gross until my freshman year of college when a heavy of the chocolate light on coffee mocha started to appeal to me.  Up until then I never had coffee but, I loved coffee ice cream.  With this nugget of information I decided to make these chocolate chip coffee muffins.  Making bigger batches of food these days are helping out tremendously as the kids schedules begin to fill up.  Both kids loved these moist muffins.  The coffee flavor is present but, not over powering.  will be making these again because there is nothing wrong with a cup of coffee and a chocolate chip coffee muffin.


chocolate chip coffee muffins
source: cooking light

2/3 cup whole milk
5 tablespoons butter, melted
3 tablespoons instant decaf coffee granules
1 1/2 teaspoons vanilla extract
1 large egg, lightly beaten
9 ounces all-purpose flour (about 2 cups)
2/3 cup sugar
1/2 cup semisweet chocolate chips
2 teaspoons baking powder
1/4 teaspoon salt

Preheat oven to 400°.

Combine first 5 ingredients.

Lightly spoon flour into dry measuring cups; level with a knife. Combine flour and next 4 ingredients (through salt) in a large bowl; stir well with a whisk. Make a well in center of flour mixture. Add milk mixture to flour mixture; stir just until moist.

Spoon batter into 12 muffin cups lined with wrappers. Bake at 400° for 18 minutes or until done. Remove muffins from pan immediately; place on a wire rack.

Monday, February 27, 2012

mint chocolate chex treats


I am a nut about a lot of random things.  In my kitchen I am neurotic about not wasting food and keeping a clean refrigerator and pantry.  I do not like half eaten packages of food to sit around and rot.  During a bit of spring cleaning in the kitchen I discovered a bunch of partially used holiday baking products.  The chocolate mint combination will not translate in the spring so, I threw chocolate chex cereal, chocolate mint marshmallows and mint truffle kisses together.  I was really skeptical of the results when I started to melt the mint marshmallows and the mixture had a grey tone.  Grey food is really unappetizing.  Once the marshmallows were mixed with the cereal and kisses the grey tone was replaced and things were looking up.  We were on our way to Mammoth for the week and because I was put off by the grey tone I almost left these treats at home.  Bringing them was a smart decision because they were gobbled up by the adults.  The kids thought the mint flavor was too prominent.  My type A behavior paid off.  Tasty, simple no bake treats and a cleaner pantry which is a win all around.


mint chocolate chex treats
source: sweetflours

3 tablespoons unsalted butter
10.5 ounce bag chocolate mint jet puffed marshmallows
4 cups chocolate chex cereal
2 cups cocoa krispies
2 cups mint truffle Hershey kisses; chopped

Melt butter in large saucepan over low heat. Add mint marshmallows and stir until completely melted. Remove from heat.

Add chex cereal. Stir until well coated. Add chopped mint truffle Hershey kisses and stir until pieces are incorporated.

Using a buttered spatula press mixture evenly into 13 x 9 x 2-inch pan coated with cooking spray. Cut into 2-inch squares when cool.

Monday, February 20, 2012

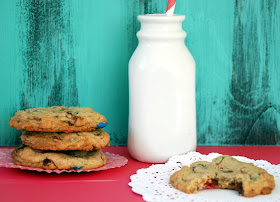
kid's candy cookies


I realized something last week.  It kinda broke my heart.  I became aware during the lead up to Valentine's Day that some day my sweet boy is not always going to want me as his Valentine.  During pick up I noticed that the door was decorated with hearts.  Each kid had to explain what love was.  Carter nailed it with "love is hugs from my mom".  I mean come on he stole my heart.  Then I started to glance through the other responses and there it was.  A heart with "love is CARTER".  A girl with a crush on Carter.  what ?!? A very cute, sweet little girl.  Of course the minute we got in the car I started in with 20 questions.  I got nowhere.  He got embarrassed and flustered and just did not want to discuss said crush.  My spot in the world felt jeopardized.  So I did what any good mom would do and came home and baked up some cookies with all sorts of his favorite candies to solidify my place in his heart for a little longer.  We snuggled in our breakfast nook snacking on cookies and milk and the whole world felt right again. 


kid's candy cookies
adapted: food network magazine

ingredients

2 1/4 cups all-purpose flour
1 teaspoon baking soda
2 sticks unsalted butter, at room temperature
1 cup packed light brown sugar
1/2 cup granulated sugar
1 teaspoon salt
1 tablespoon vanilla extract
1 large egg plus 1 egg yolk
1 cup pretzel m&m's
1/2 cup semi sweet chocolate chunks or chips ~3 ounces
1/2 cup toffee pieces
3/4 cup peanut butter chips

directions

Preheat the oven to 350 degrees F. Line 2 baking sheets with silpat sheets or parchment. Whisk the flour and baking soda in a bowl.

In a stand mixer fitted with the paddle attachment, cream the butter, brown sugar and granulated sugar on low speed until incorporated, then increase to high speed and beat until light and fluffy.

Add the salt, vanilla, whole egg and egg yolk to the mixer; beat until thoroughly combined. Add the m&m's and beat for a few seconds until slightly crushed. Gradually add the flour mixture, mixing on low speed until just combined. Mix in the chocolate, toffee pieces and peanut butter chips.

Roll heaping tablespoonfuls of dough into balls and place on the prepared baking sheets, about 2 inches apart. Slightly flatten each ball.

Bake the cookies until the edges are golden brown and the centers are no longer wet, 11 to 13 minutes. Cool on the baking sheets for a few minutes, then transfer to a rack to cool completely.

Monday, February 13, 2012

buttermilk pancakes


The Secret Recipe Club is back for the first cycle of 2012.  I was assigned the blog eggs milk and honey.  The blog is written by Heather an American mother of four living in England.  Her blog is filled with delicious family friendly recipes with glimpses of her family life in England.  My motivation to replace processed food in our house this year without total household revolt has not dropped.  I have successfully tackled and replaced the breakfast bars.  When I read through Heathers blog I came across a recipe for buttermilk pancakes.  This was a perfect opportunity to give bisquick the boot from my cupboard.  I have to be honest I am not a pancake person.  I like a bite but, I am much more and eggs and bacon girl.  My kids and husband however, request pancakes at least once a week.  I pull out the bisquick do a quick mix and pancakes are on the table.  There are always a few left so, I freeze them to pop in the toaster later in the week.  This Saturday I changed things up with Heather's recipe which is not much harder then bisquick but, tastes so much better then bisquick.  They are light and fluffy with the perfect tang from the buttermilk.  There was not a single cake left.  My daughter even ate the little crunchy pieces that end up on the griddle.  I knew this was going to replace my bisquick box once and for all so, I mixed up a few mason jars of the dry ingredients so, I can quickly pull them out and mix up a batch of perfect buttermilk pancakes.


buttermilk pancakes

source: eggs milk and honey

Ingredients

1 cup flour
2 teaspoons sugar
1/2 teaspoon salt
1/2 teaspoon baking powder
1/4 teaspoon baking soda
3/4 cup buttermilk
1/4 cup whole milk
1 large egg, separated
2 tablespoons butter, melted

Whisk together all the dry ingredients in a medium-sized bowl. Combine buttermilk and milk into small bowl. Whisk egg white into mixture. Mix yolk with melted butter in separate bowl. Then stir into milk mixture. Dump wet ingredients into dry ingredients all at once; whisk until just mixed.


Once the griddle or pan is hot enough, pour 1/4 cup of batter onto a lightly oiled or buttered surface. When the pancake surface starts to bubble and the bottom is lightly browned, turn over. It should take a couple of minutes. Cook until remaining side has browned.


Monday, February 6, 2012

banana pudding pops


The kids are still asking for popsicles every day.  You may be thinking popsicles in February what is wrong with this girl.  The weather here is unseasonably warm this winter.  The past two weekends we have spent at the beach.  My kids are wearing SPF 50 and I actually have a little sunburn on my back.  Crazy but, incredibly amazing.  The kids loved the orange pudding pops but, in my effort to reduce the processed food I looked for another way to achieve a pudding pop with out pudding mix and cool whip.  They may have actually liked these even more which is a win for all of us.  Perfect southern California winter treat for an afternoon snack or dessert.

banana pudding pop
adapted: eating well

ingredients
1/3 cup light brown sugar
2 tablespoons cornstarch
pinch of salt
2 cups milk
2 teaspoons vanilla extract
2 cups diced bananas, (~ 2 large)
6 ounces greek honey yogurt
10 animal cookies or nilla wafers crushed into small pieces

Whisk sugar, cornstarch and salt in a large saucepan. Add milk and whisk until combined. Bring to a boil over medium heat, whisking occasionally. Boil, whisking constantly, for 1 minute. Remove from the heat and stir in vanilla.  Allow mixture to cool slightly.

Put about the pudding in a blender and add bananas and yogurt. Process until smooth.  Stir the crushed cookies into the pudding mixture.  Divide the mixture among freezer-pop molds. Freeze until firm ~6 hours.

Monday, January 30, 2012

yellow butter cake with chocolate frosting


So, you know how I have been talking about reducing the processed food and sugar in my house?  Well that new mantra is cool and all except when it comes to birthdays.  I am working on introducing new healthy replacements for many of our sugary snacks and treats but, even I am not at a place where I want to enjoy an agave sweetened gluten free oat cake on my birthday.  Maybe in 2013 but, for now we will just celebrate old school with a yellow butter cake and chocolate frosting.  This cake is a classic that I am not prepared to screw with at this point.  I am not going to lie I have a better yellow cake recipe but, it is super involved and this recipe is simple straight forward and most likely have all the ingredients already in your kitchen.  The frosting is down right delicious and so, easy.  This is my go to chocolate fudge frosting.  Did you know you can make super good frosting in the food processor?  Well you can and you don't even have to sift.  So if you are looking for a simple yet, delicious and decadent cake for your next gathering this classic may be the way to go. 


yellow butter cake with chocolate frosting
cake adapted: martha stewart
frosting source: sky high cakes

Cake:
2 sticks (1 cup) unsalted butter, at room temperature
1½ cups all-purpose flour
1½ cups cake flour
1 tablespoon baking powder
½ teaspoon salt
1¾ cups sugar
4 large eggs
2 teaspoon vanilla extract
1¼ cups milk

Frosting:
6 ounces unsweetened chocolate, melted and cooled
4 1/2 cups confectioners’ sugar (no need to sift)
3 sticks (12 ounces) unsalted butter, at room temperature
6 tablespoons whole milk
1 tablespoon vanilla extract

Directions:  To make the cakes, preheat the oven to 350˚ F. Prepare two 9-inch round cake pans with bakers joy. In a medium bowl, sift the all-purpose flour, cake flour, baking powder, and salt; whisk together to blend well and set aside.

In the bowl of an electric mixer, combine the butter and sugar. Beat on medium-high speed until light and fluffy, about 4 minutes, scraping down the bowl as needed. Mix in the eggs one at a time, beating well after each addition. Blend in the vanilla. With the mixer on low speed, add in the dry ingredients in three additions, alternating with the milk. Beat each addition just until incorporated.

Divide the batter between the prepared baking pans. Bake, rotating the pans halfway through baking, until the cakes are golden and a toothpick inserted in the center comes out clean, 30-35 minutes. Transfer the pans to a wire rack and let cool 20 minutes. Run a knife around the edge of the pans to help remove the cakes. Invert the cakes onto the rack. Let the cakes cool completely before frosting. Level the cakes if necessary.

To make the frosting, place all of the ingredients in a food processor and pulse to incorporate, then process until the frosting is smooth.

To assemble the cake, place one of the cake layers on a serving platter. Top with 1 cup of the chocolate frosting and smooth over the top of the cake. Top with the remaining cake layer. Frost the top and sides of the cake with the remaining frosting as desired. Refrigerate, covered, for up to 3 days. Let come to room temperature at least 30 minutes before serving.

Thursday, January 26, 2012

slow cooker basic marinara sauce


Now that I am a stay at home mom I am trying to find as many short cuts and tricks to still get a home cook meal on the table without having to leave the park early and spend hours in the kitchen.  Learning  to master my slow cooker is my personal challenge for 2012.  This recipe makes a ton of marinara sauce.  I portioned it out and froze it for future meals which helps a ton when you are trying to throw together a quick home cooked meal.  Not only is this marinara sauce easy and tasty but, it is the perfect vehicle to hide some extra veggies in the kids meals.  We had it one night as written below.  There was no revolt which is always a score when introducing a new recipe to my family.  The next night I pureed carrots and zucchini and added them into the sauce while reheating it and no one made a peep.  This is a great basic sauce which you can use in a ton of different ways and doctor it up to your families taste.  Enjoy!

slow cooker basic marinara sauce
source: slow cooker revolution

2 tablespoons extra virgin olive oil
2 onions, minced
6 garlic cloves, minced
2 tablespoons tomato paste
2 teaspoons dried oregano
2 anchovy fillets, rinsed patted dry and minced
pinch red pepper flakes
1 cup dry red wine
1 28 ounce can crushed tomatoes
1 28 ounce can diced tomatoes, drained
1 28 ounce can tomato sauce
2 tablespoons soy sauce
1/2 cup minced fresh basil
2 teaspoons sugar
salt and pepper

Heat oil in skillet over medium high heat.  Add onions through red pepper flakes.  Cook until onions are soft and slightly browned, ~8-10 minutes.  Stir in wine.  Scrap up brown bits and simmer until slightly thickened, ~ 5 minutes.  Transfer to slow cooker.

Stir crushed tomatoes through soy sauce into slow cooker.  Cover and cook for 9 - 11 hours on low or 5 to 7 hours on high.

Before serving stir in basil and sugar.  Add salt and pepper to taste.

Monday, January 23, 2012

chewy granola bars


I stopped buying processed snacks for my kids about a year ago.  I am not a health freak but, I started to see how much processed food they were getting outside the house that I made a decision to reduce the total amount by not having any in our cupboards. My kids adapted really well and know to never ask for those items at the grocery store but, I have become known as the mom in the neighborhood with the lame snacks.  Apple slices, pears and string cheese are not bringing the kids in the front door.  One thing that I continued to buy last year was cereal bars.  My kids ask for one about 3 days a week.  One morning I was looking at the box and read that there are over 40 ingredients in them.  Many of the ingredients I had no idea what they were.  Earlier in the year my nutritionist insisted I cut bars out of my every day menu and have them on hand as an emergency food.  Why had this correlation with the kids bars not clicked at that time?  At this fully caffeinated moment I realized I could do more then ban goldfish crackers.  I made a pact to find better replacements for some of the processed foods that still lingered on my shelves.  I am really excited to share these over the next few months.  We have had a lot of fun in the kitchen experimenting.  The granola bars are a work in progress.  I started out with this recipe from King Arthur which is really good but, there are still many ingredients in this recipe I knew I could swap out.  I concocted a loose formula which seems to work and is great because you can experiment with all different flavors.  I often use up fruit and nuts I bought for a salad or I have the kids get creative with the bin choices at Mother's.  Below are a few flavor combinations that have worked for me but, the possibilities are endless. 


chewy granola bars

GRAIN (2 1/2 cups)
*suggestions: oats, oat flour, oat bran, wheat germ, quinoa flakes, muesli etc.

NUTS, SEEDS, CRUNCH (1 - 1 1/2 cup)
*suggestions: sliced almonds, peanuts, chia seeds, flax seed, brown rice cereal, pretzels, sunflower seeds, pepitas etc.

SPICES
*suggestions: cinnamon, ginger, salt, pumpkin pie spice, vanilla extract etc.

DRIED FRUIT (1 cup)
*suggestions: cranberries, blueberries, banana chips, dates, pineapple, coconut etc.

FUN (1/4 - 1/2 cup)
*suggestions: carob chips, chocolate covered berries, yogurt chips etc.

STICKY (~3/4 cup)
* I typically mix two stickies.  1/3 - 1/2 cup of one and 1/4 cup of another.  See examples below.
*suggestions: honey, brown rice syrup, maple syrup, agave etc.

BINDER (1 cup)
* I make sure there are at least 6 tablespoons of a fat source.  That could be nut butter, coconut oil, melted butter etc.
* suggestions: almond butter, peanut butter, pumpkin puree, unsweetened applesauce, greek yogurt, apple butter, banana puree, egg whites, melted butter, coconut oil, neutral oil etc.

Directions:

Preheat oven to 350.  Line a 9x9 pan with a parchment sling.

In a large bowl mix together all of your dry ingredients.  That includes grains, nuts, seeds, crunch, dry spices, fruit and fun stuff.  If you are going to add a bit more stick by way of sugar toss that in here.

In a medium bowl whisk together your sticky sweetener, liquid spices, and binder.

Pour the liquid mixture into your dry mixture and gently fold/mix the two together until all the dry ingredients are coated.

Turn the mixture into the prepared pan.  Make sure it is spread evenly and then press and pack the mixture down into the pan.

Bake for ~30 minutes.  The top will get a tad brown.  Remove from oven and allow bars to cool in pan for 20 minutes.  When bars are cool then place the pan in the refrigerator or freezer for approximately 30 minutes.  Once bars have set up use the parchment sling to remove bars and slice. 

Bars store in an air tight container for a week or in the freezer for 2 months.

Enjoy! Have a delicious and healthy day.

Note:
I store them in the freezer as they do get a bit crumbly. If would want them a bit stickier then toss the oats in a 1/4 cup of sugar (brown, white or turbinado).If you want to boost the protein you could add soy or hemp protein powder.


Banana Honey Carob Granola Bars (The Elvis) - Kids current favorite
1 1/2 cup rolled oats (not instant)
1/2 cup oat bran
1/2 cup wheat germ
1/2 cup brown rice cereal
2 tablespoons chia seeds
1/3 cup unsalted roasted peanuts, crushed
1/3 cup banana chips, crushed
1/3 cup pretzels, crushed
1/4 cup carob chips
1/2 teaspoon salt
1/4 teaspoon cinnamon
1/3 cup honey
1/4 cup brown rice syrup
1/2 cup natural creamy peanut butter
1/2 cup banana puree ~ 2 medium brown bananas

Follow directions above.

Almond Cranberry Dark Chocolate Granola Bars
1 1/2 cup rolled oats (not instant)
1/2 cup oat bran
1/2 cup wheat germ
1/2 cup brown rice cereal
1/2 cup sliced raw almonds
2 tablespoons chia seeds
1 cup dried cranberries
1/2 cup shredded coconut
1/2 cup chocolate covered cranberries
1/2 teaspoon salt
1/4 teaspoon cinnamon
1/3 cup honey
1/4 cup brown rice syrup
1/2 cup almond butter
1/2 cup greek yogurt

Follow directions above.

Wednesday, January 18, 2012

french onion soup


My dear friend "C" embraces life so, when the reminder for supper club came out and labeled the theme as Tyler Florence, Napa inspired, rustic, localvore and a sparkly NYE redux I giggled but, was not surprised.   Most of us in the group spent NYE in our pajamas with greasy pizza, kids and eyes closed before midnight.  And when I say midnight I mean the east coast midnight even though we are southern California girls.  Pathetic but, that is our reality.  In order to not let an opportunity to sparkle pass us by "C" encouraged us to dress in cocktail attire.  This group loves them some glitter and some good food.  Cocktail hour started with a woo woo cocktail, artichoke fritters and crostini.  Tyler Florence can really throw down some vodka, butter, oil and down right yumminess.

The table was localvore inspired with fresh artichokes, oranges and succulents from the farmers market.  Very rustic, local, and beautiful.  Each place setting had a quote from Tyler which started with "family is the people you spend a great deal of time with, care for and trust...a two-way street".  The quote was perfection for this group as I know in my heart I could call any of them at any time and they would be there for me.  They feel like family and even though we could have spent the evening munching on the amazing osso buco over creamy polenta with serious and deep conversation we choose to talk about completely ridiculous things like if you could be any celebrity who would you be.  Love the family of friends I have choose in life.

I made the french onion soup which was good but, I would increase the onion a bit, decrease the broth a bit and let the soup sit and cool a bit to let the flavors meld a bit more.  It definitely tasted better when I reheated it to serve at the house.  French onion soup is a bit rustic and comforting yet decadent and delicious in one little bowl of love.

french onion soup
adapted: tyler florence

1/2 cup unsalted butter
4 large onions, sliced
2 garlic cloves, chopped
2 bay leaves
2 fresh thyme sprigs
kosher salt and freshly ground black pepper
1 cup red wine
3 heaping tablespoons all-purpose flour
1.5 -2 quarts beef broth
1 baguette, sliced
8 ounces grated gruyere


Directions

Melt the stick of butter in a large pot over medium heat. Add the onions, garlic, bay leaves, thyme, and salt and pepper and cook until the onions are very soft and caramelized, about 25-30 minutes.

Add the wine, bring to a boil, reduce the heat and simmer until the wine has evaporated and the onions are dry, about 5-10 minutes. Discard the bay leaves and thyme sprigs.

Dust the onions with the flour and give them a stir. Turn the heat down to medium low so the flour doesn't burn, and cook for 8-10 minutes to cook out the raw flour taste. Now add the beef broth, bring the soup back to a simmer, and cook for 10 minutes. Season, to taste, with salt and pepper.

Ladle the soup into bowls, top each with 2 slices of bread and top with cheese. Put the bowls into the oven under broiler to toast the bread and melt the cheese.

Tuesday, January 10, 2012

orange dream pudding pops


When 3 pounds of oranges arrived in my CSA box this week I knew I would have to motivate myself with 2012 blog goal #3 (use CSA box ingredients more creatively).  I am the only person in this house that eats oranges and while I really do like them 3 pounds is a lot for even this girl.  The crazy warm winter days that we have been enjoying has been prompting Carter to constantly request popsicles.  I started googling orange sherbet but, then I had an 80s flashback of pudding pops.  I loved pudding pops and can vividly remember that thin layer of ice that encased the pop.  Once you cracked the ice layer the most creamy center was right beneath.  They were delicious.  I had all of the ingredients to whip together orange dream pudding pops.  Carter and I squeezed the oranges and got mixing.  The results were fantastic.  There is no thin icy layer but, the pop is just as creamy as I remember.  These pops must really evoke dreams because Carter woke up the next day and said "mommy I had a dream last night that you let me eat two pudding pops".  True sweet dreams.

orange dream pudding pops
adapted: glutenfreefive

1 large box instant vanilla pudding
8 ounces vanilla yogurt
1 1/2 cup milk
1 1/2 cup fresh squeezed orange juice
8 ounces cool whip, thawed

In a blender combine pudding, yogurt, juice and milk and blend until combined. Fold in cool whip and pour into popsicle molds and freeze for 5 hours or until firm.